Instruction On Uploading Images
To avoid images uploaded to free hosts and then expired at a later time, we require writers to upload all images that they are going to use in their guides and writings onto this site. Guides and writings whose images are hosted on third party sites will not get approved. Please understand this policy is to ensure the quality of our content.
To upload images while writing, simply follow the below steps:
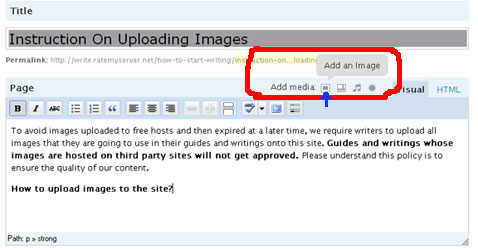
1) Find the Add Media tool set near the top right corner of the text editor. Click on the Add an Image icon (blue arrow) to load the Upload Pop-up Box as shown in step two :
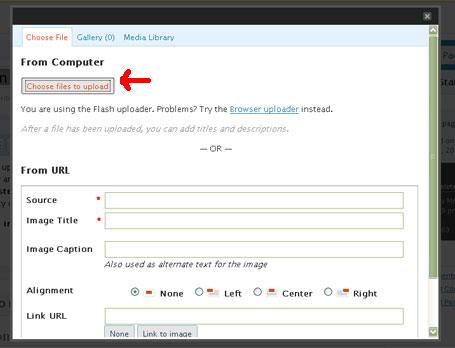
2) Click on it Choose files to upload (arrow pointing) to get the upload file window where you can pick files on your computer and then upload it:
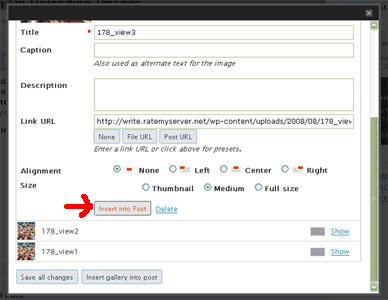
3) After the file is uploaded, you will see the following window with the image’s information and various options. You can choose to align the picture to the left, right or center relative to your post. Also you can choose to show the picture as thumbnail, medium size (maximum is 600×600 pixels) or full size. Images selected to show as thumbnail or medium size will automatically be clickable to go to the full size version when the post is published.
Finally, you get to choose to insert the image into your post as pointed by the arrow.
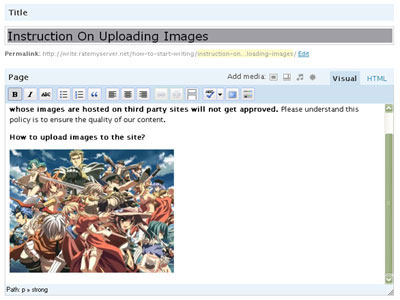
4) It will look something like this after you have successfully inserted the image to your post:
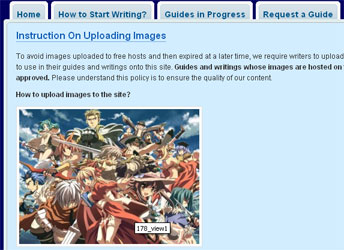
5) It will look like this in your post, with the image clickable to go to the full size image:
(The below steps are optional but would be useful to know.)
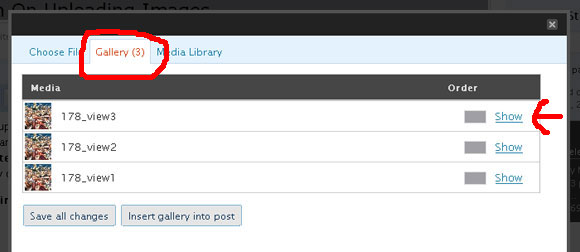
6) You can upload several images and them retrieve them all at once in the Gallery tab of the Upload Pop-up Box. (To upload more than one image, click on Choose files to upload again after you have successfully uploaded an image as shown in Step 2.)
7) At the Gallery tab you can click on Show to get the information box of each image similar to the one shown in Step 3. At the information box, you can choose to insert the image to your post.
Tips: It is recommended that you name your images prefixed with your guides title or simply make it easy to tell what is the image for. It would be much easier for you when you have a lot of images for different guides and you want to update some guides with new images. You may also want to suffix the image name with step-1 / step-2 or s1 / s2 for the same reason.

i like it beacause of you i want to ake one myself tytytyty
upload donk chumbn ROnya
im a new GM iM GM zUpkey05